
How to Install a Central Heating Pump (Expert Guide)
Central heating pumps are one of the most vital components of your home’s heating system.
Installed alongside a boiler, a central heating pump will lie at the heart of the system, circulating hot water from the boiler to the radiators and back to the boiler to be reheated.
But if this is the first time you’ve had to replace a central heating pump, or you’re installing a pump for the first time, you will probably find it slightly overwhelming.
No doubt you’re thinking:
“How do I remove a central heating pump?” … “Where should my central heating pump be located?” … and … “What even are isolating valves or connection nuts?”
That’s why we’ve created this expert guide to installing a central heating pump. Taking you from removing the old pump to ensuring the pump body has no leaks, this guide will have your home sufficiently heated in no time.
 Before you start removing the old pump, you will want to switch off the electric power source to the pump. You can do this at the fuse box. The next step is to shut off the main water valve. This is the main water valve supply to the house and should be turned off before any attempt of removing the pump. You can do this by simply turning the shut-off valve clockwise.
Important: Make sure you notify everyone in the home or building that you are working on the plumbing system.
Step 2 - Protect against water and electrical damage
Before you start removing the old pump, you will want to switch off the electric power source to the pump. You can do this at the fuse box. The next step is to shut off the main water valve. This is the main water valve supply to the house and should be turned off before any attempt of removing the pump. You can do this by simply turning the shut-off valve clockwise.
Important: Make sure you notify everyone in the home or building that you are working on the plumbing system.
Step 2 - Protect against water and electrical damage
 Your pump will either be located near the boiler or in an airing cupboard. Before you start working on the pump, make sure you take of a photo on your phone of the wiring schematic. You could even wrap different colours of electrical tape around the live, neutral and earth wires for ease of reference. You can now disconnect the electrical wiring.
Once you have completed the job, make sure you have completed this quick checklist:
Your pump will either be located near the boiler or in an airing cupboard. Before you start working on the pump, make sure you take of a photo on your phone of the wiring schematic. You could even wrap different colours of electrical tape around the live, neutral and earth wires for ease of reference. You can now disconnect the electrical wiring.
Once you have completed the job, make sure you have completed this quick checklist:
 The next step is to drain the pump. Start by removing the bleed screw in the centre of the pump. This should drain the system. Then, place a small bucket underneath the pump and start unscrewing the nuts connecting the pump to the pipework. When one side is loose, check the state of the water flow by wiggling the pump end. Use the pump and allow the water to leak out.
Step 4: Remove the old pump
The next step is to drain the pump. Start by removing the bleed screw in the centre of the pump. This should drain the system. Then, place a small bucket underneath the pump and start unscrewing the nuts connecting the pump to the pipework. When one side is loose, check the state of the water flow by wiggling the pump end. Use the pump and allow the water to leak out.
Step 4: Remove the old pump
 Once the above tasks are complete, you will be able to unwind all of the nuts connecting the pump to the pipework and remove the pump from its location - making sure all the time that any old seals are also removed from valves. When removing the pump, make sure you hold the pump over the bucket to catch any left of water trapped inside the pump.
Step 5: Fit the new pump
Once the above tasks are complete, you will be able to unwind all of the nuts connecting the pump to the pipework and remove the pump from its location - making sure all the time that any old seals are also removed from valves. When removing the pump, make sure you hold the pump over the bucket to catch any left of water trapped inside the pump.
Step 5: Fit the new pump
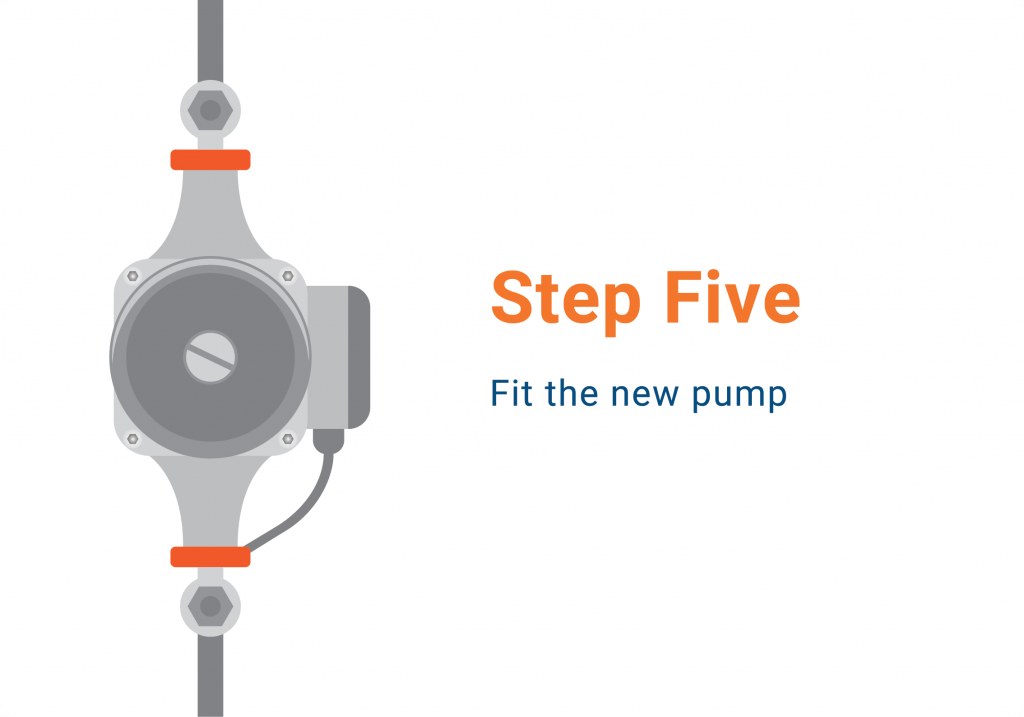 Now you can start to install the new pump in place of the old one. It’s important to ensure that the new pump’s seals are located correctly and connected tightly to the valves so there is no possibility of water leakage.
Step 6: Test for leaks
Now you can start to install the new pump in place of the old one. It’s important to ensure that the new pump’s seals are located correctly and connected tightly to the valves so there is no possibility of water leakage.
Step 6: Test for leaks
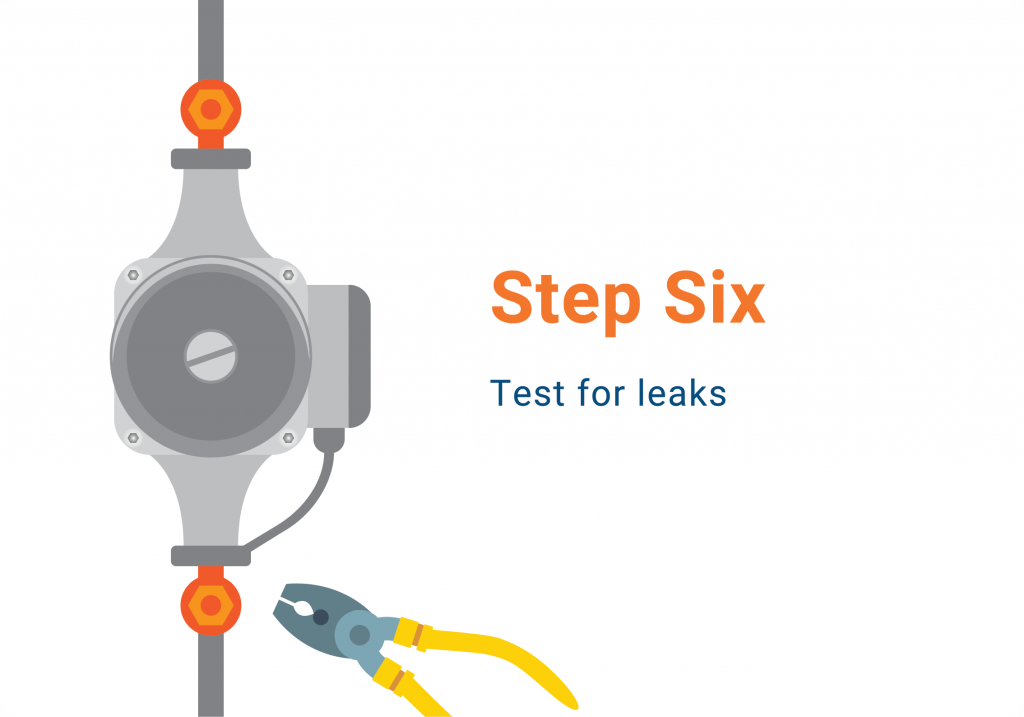 Before turning on the main water supply, test for leaks by slowly turning one of the gate valves anti-clockwise. This should show up any leaks. If the pump starts to leak water, you will need to either tighten the nuts on either side of the pump or adjust the rubber O ring. Examine all valves and connection points and tighten any valve or connections that show signs of leakage.
Step 7: Reconnect the main water supply and check for leaks
Before turning on the main water supply, test for leaks by slowly turning one of the gate valves anti-clockwise. This should show up any leaks. If the pump starts to leak water, you will need to either tighten the nuts on either side of the pump or adjust the rubber O ring. Examine all valves and connection points and tighten any valve or connections that show signs of leakage.
Step 7: Reconnect the main water supply and check for leaks
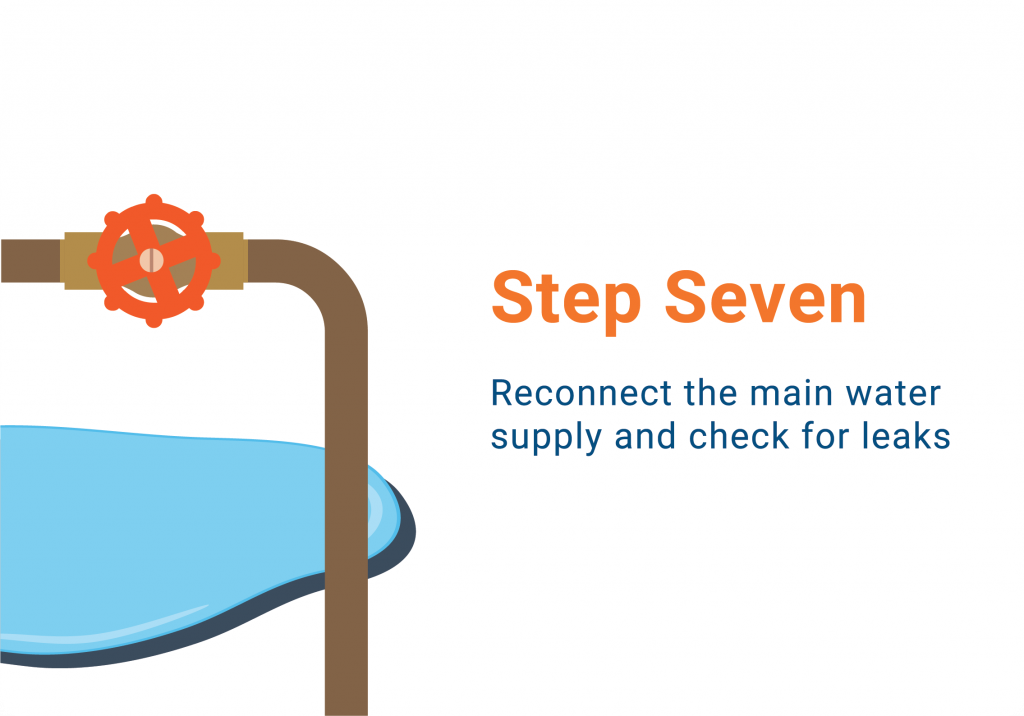 Reconnect the main water supply, open up the valves and re-fill the heating system. This should show up any leaks. Examine all valves and connection points and tighten any valve or connections that show signs of leakage. Do not reattach any electrical connections before you are completely satisfied that the pump is not leaking.
Step 8: Reattach the electrical connections and switch on the main electricity supply
Reconnect the main water supply, open up the valves and re-fill the heating system. This should show up any leaks. Examine all valves and connection points and tighten any valve or connections that show signs of leakage. Do not reattach any electrical connections before you are completely satisfied that the pump is not leaking.
Step 8: Reattach the electrical connections and switch on the main electricity supply
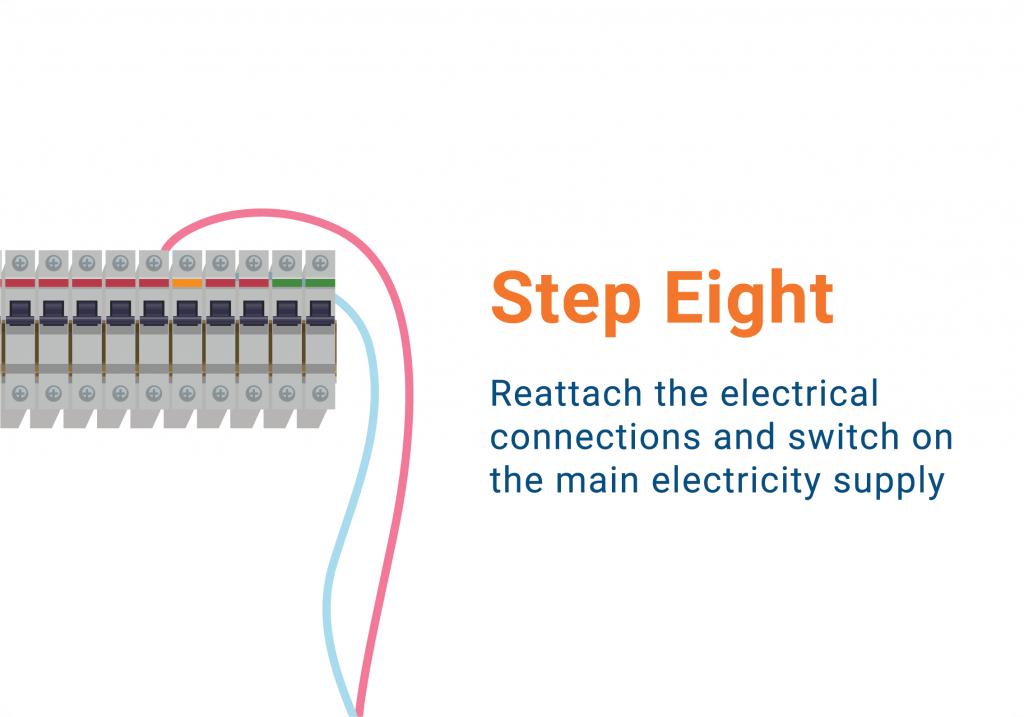 If you are happy that there are zero leaks, reattach the electrical connections. Make sure that you are installing earth, live and neutral to the correct points – and if you are unsure on this aspect of the re-fit, contact a qualified electrician. Once satisfied, switch on the main electricity supply to the pump, and if you have followed the steps correctly, the pump should be operating correctly without loud noises or rattling.
What tools do I need to install a central heating pump?
Before you start ripping off pipes or removing the electrical connection, it’s important that you have the right tools to carry out the job. Ensure you have the following tools available: Tools needed:- Towels
- Pliers or adjustable spanner
- Bleed key or a flat-head screwdriver
- Electrical tester
8 Steps to Installing a Central Heating Pump
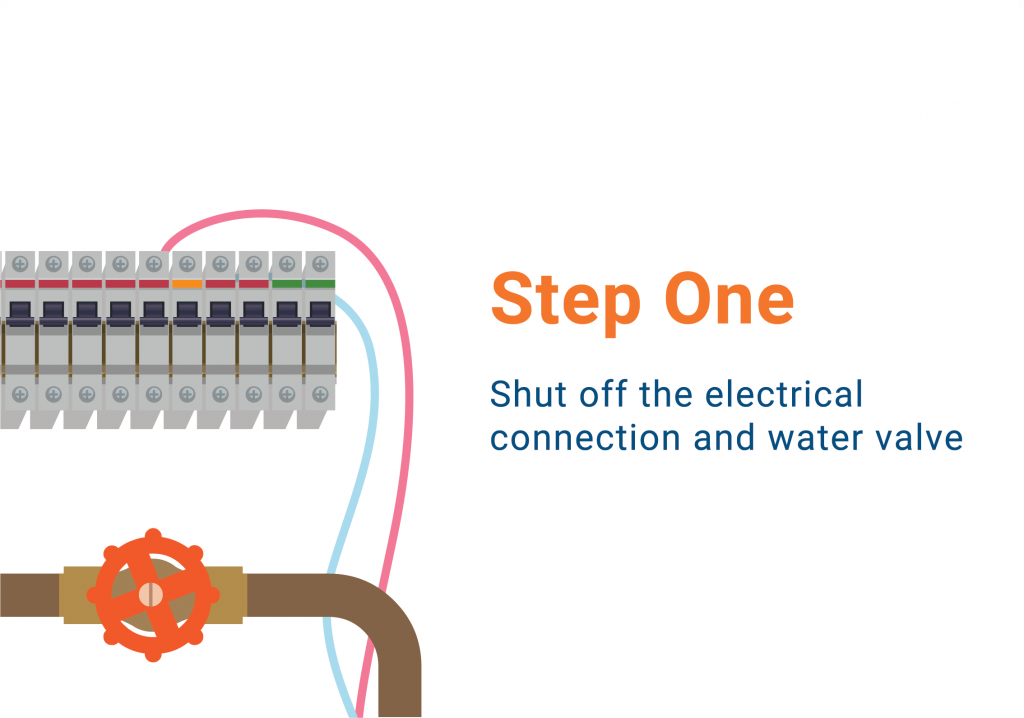
Step 1: Shut off the electrical connection and water valve
Before you start removing the old pump, you will want to switch off the electric power source to the pump. You can do this at the fuse box. The next step is to shut off the main water valve. This is the main water valve supply to the house and should be turned off before any attempt of removing the pump. You can do this by simply turning the shut-off valve clockwise.
Important: Make sure you notify everyone in the home or building that you are working on the plumbing system.
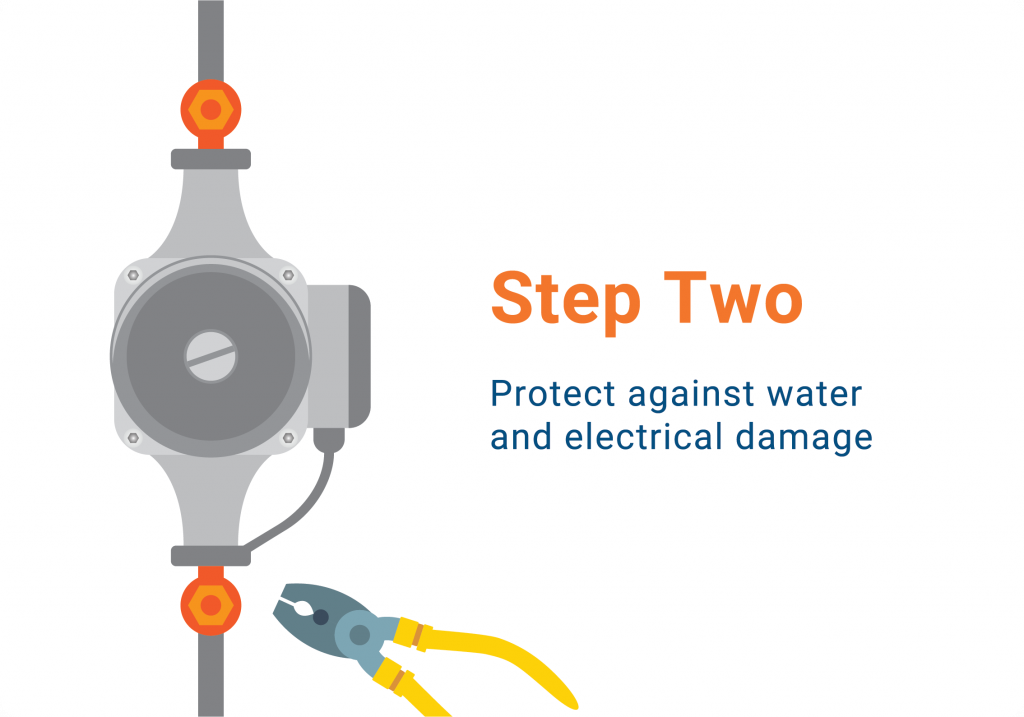
Step 2 - Protect against water and electrical damage
Your pump will either be located near the boiler or in an airing cupboard. Before you start working on the pump, make sure you take of a photo on your phone of the wiring schematic. You could even wrap different colours of electrical tape around the live, neutral and earth wires for ease of reference. You can now disconnect the electrical wiring.
Once you have completed the job, make sure you have completed this quick checklist:
- Has the electricity been turned off and isolated? Check by using the electrical tester.
- Have you turned off the main water supply at the shut-off valve? Double check before starting work.
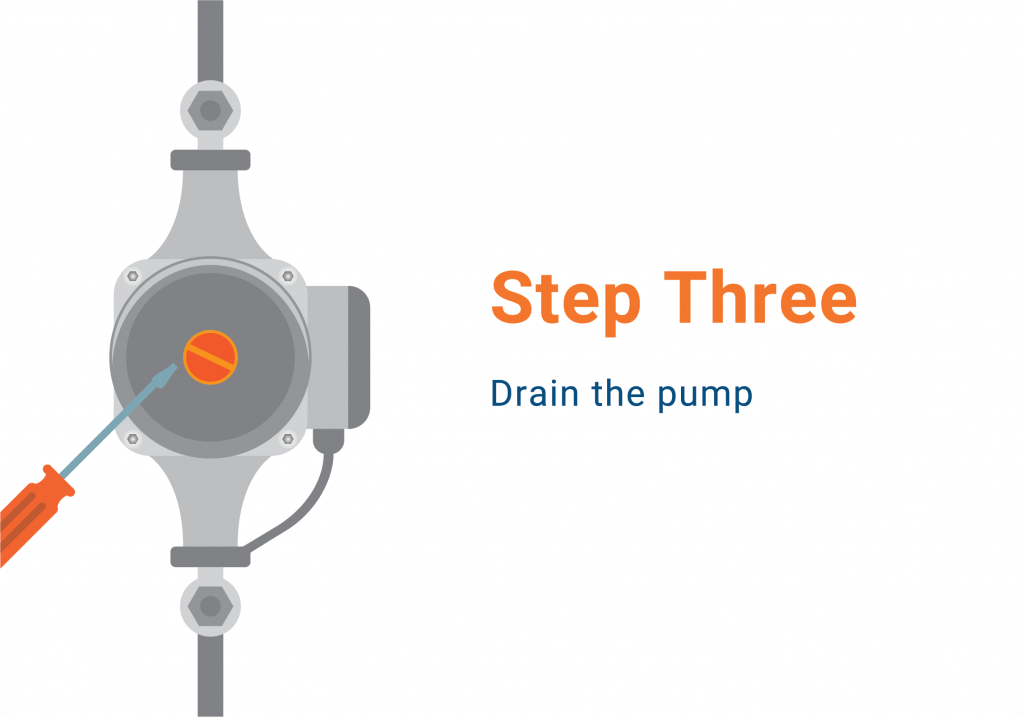
The next step is to drain the pump. Start by removing the bleed screw in the centre of the pump. This should drain the system. Then, place a small bucket underneath the pump and start unscrewing the nuts connecting the pump to the pipework. When one side is loose, check the state of the water flow by wiggling the pump end. Use the pump and allow the water to leak out.
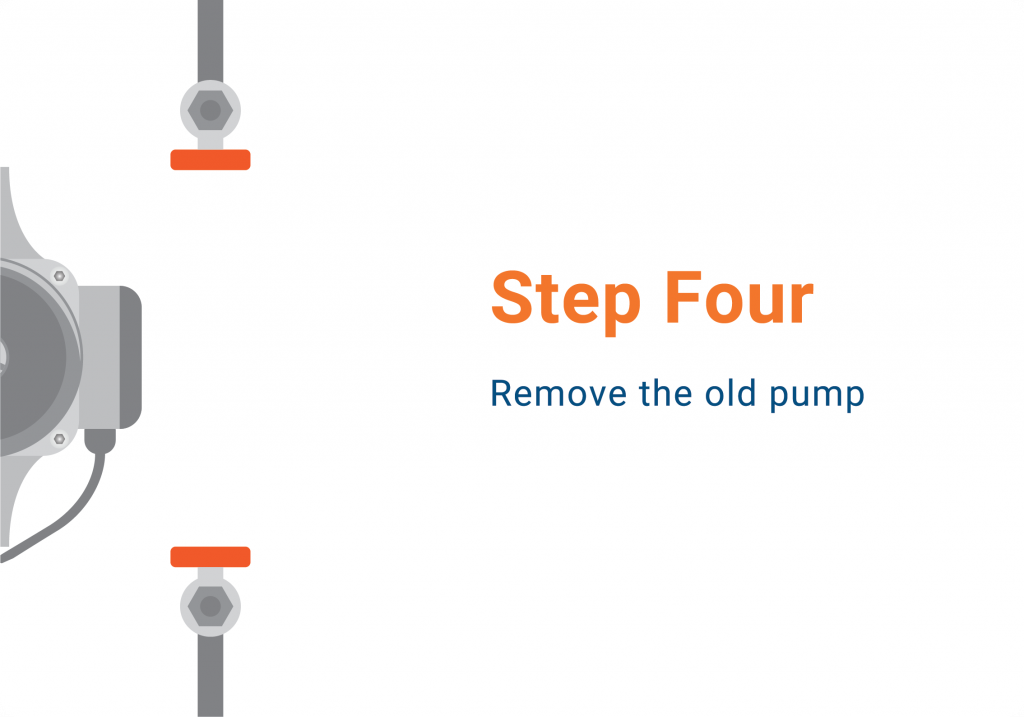
Step 4: Remove the old pump
Once the above tasks are complete, you will be able to unwind all of the nuts connecting the pump to the pipework and remove the pump from its location - making sure all the time that any old seals are also removed from valves. When removing the pump, make sure you hold the pump over the bucket to catch any left of water trapped inside the pump.
Step 5: Fit the new pump
Now you can start to install the new pump in place of the old one. It’s important to ensure that the new pump’s seals are located correctly and connected tightly to the valves so there is no possibility of water leakage.
Step 6: Test for leaks
Before turning on the main water supply, test for leaks by slowly turning one of the gate valves anti-clockwise. This should show up any leaks. If the pump starts to leak water, you will need to either tighten the nuts on either side of the pump or adjust the rubber O ring. Examine all valves and connection points and tighten any valve or connections that show signs of leakage.
Step 7: Reconnect the main water supply and check for leaks
Reconnect the main water supply, open up the valves and re-fill the heating system. This should show up any leaks. Examine all valves and connection points and tighten any valve or connections that show signs of leakage. Do not reattach any electrical connections before you are completely satisfied that the pump is not leaking.
Step 8: Reattach the electrical connections and switch on the main electricity supply
If you are happy that there are zero leaks, reattach the electrical connections. Make sure that you are installing earth, live and neutral to the correct points – and if you are unsure on this aspect of the re-fit, contact a qualified electrician. Once satisfied, switch on the main electricity supply to the pump, and if you have followed the steps correctly, the pump should be operating correctly without loud noises or rattling.